Introduction
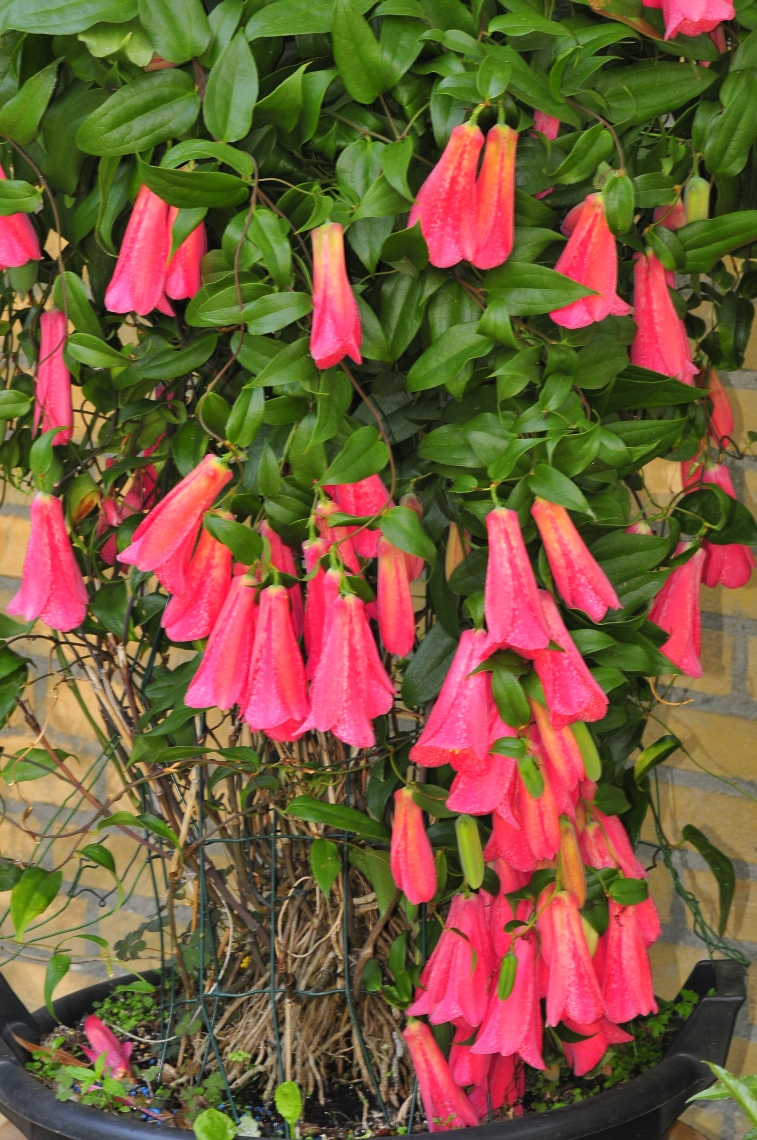
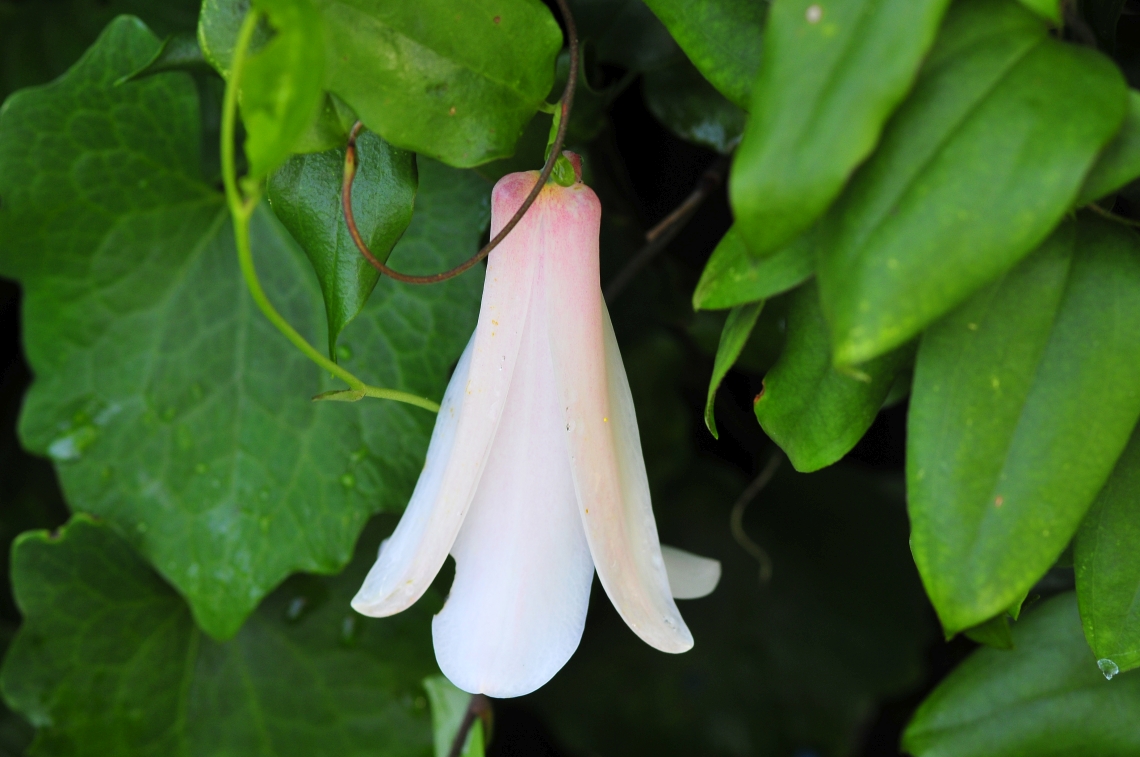
The Lapageria rosea is to be found in Chile, where as the national plant it’s called Copihue. As the plant reaches maturity and with the necessary care, the plant will flower richly and will remain on the plant for a fairly long period. In fact once you’ve seen this plant in bloom, you’ll want to include it in your collection. However, this is not so straightforward. The Lapageria rosea is expensive and difficult to acquire!
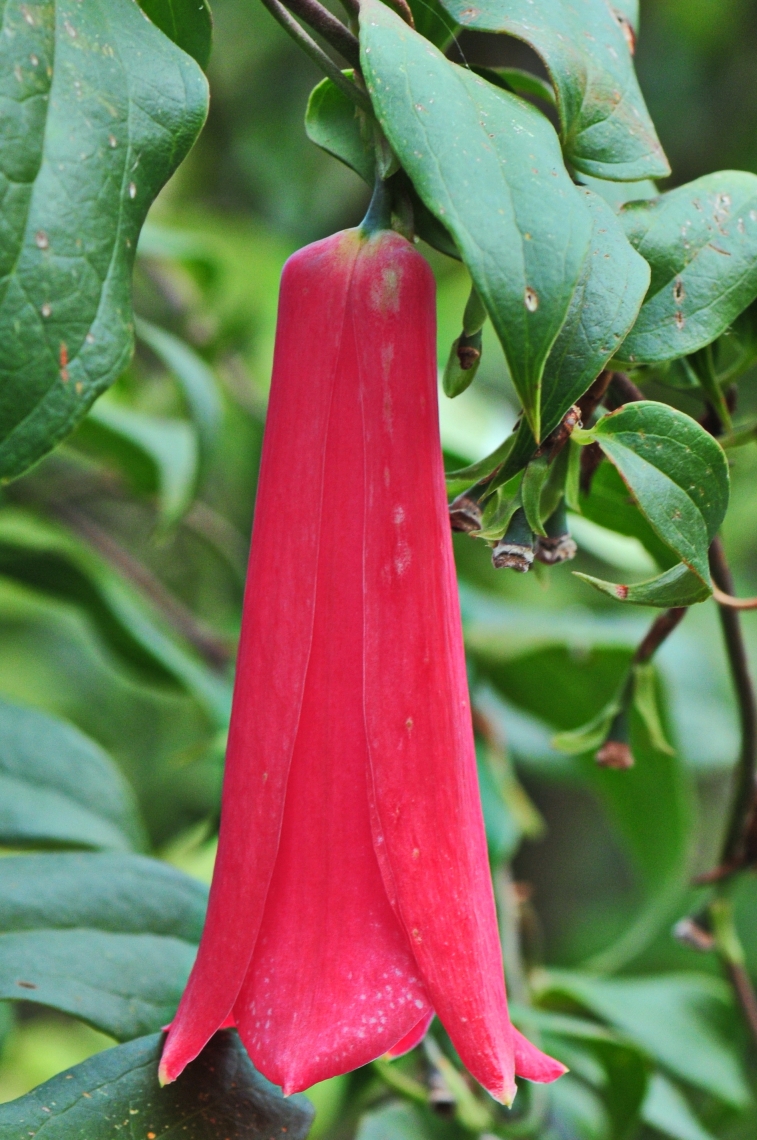
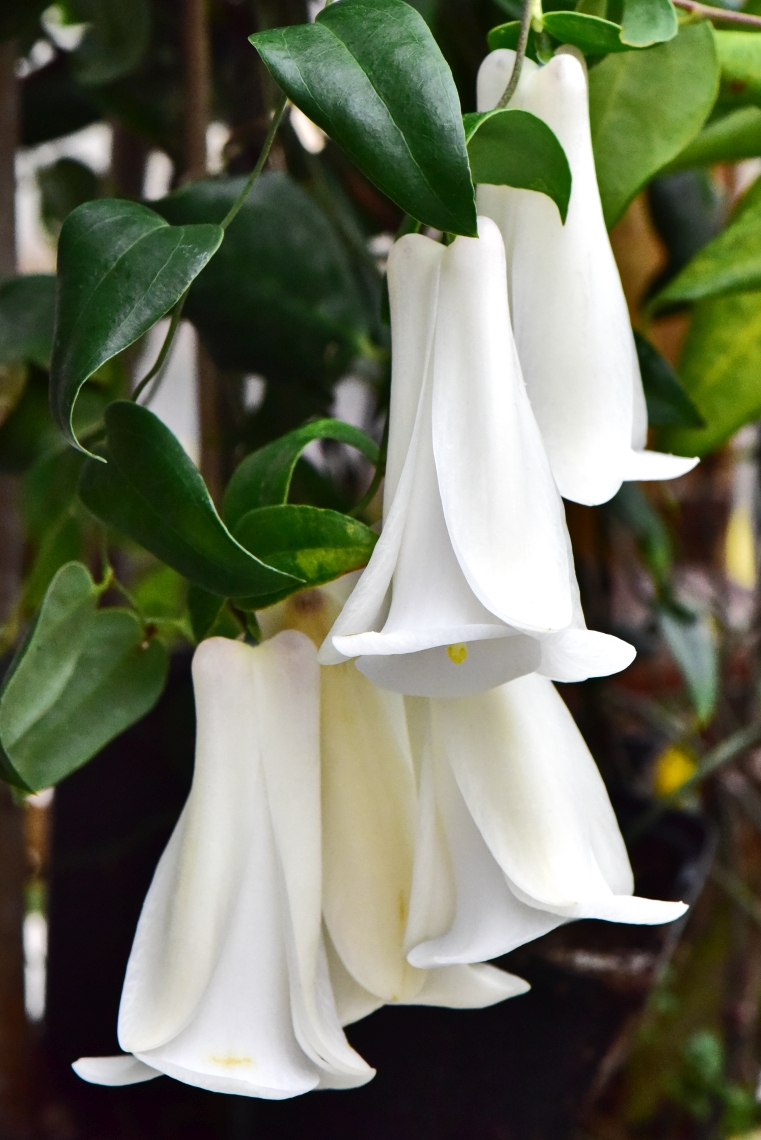
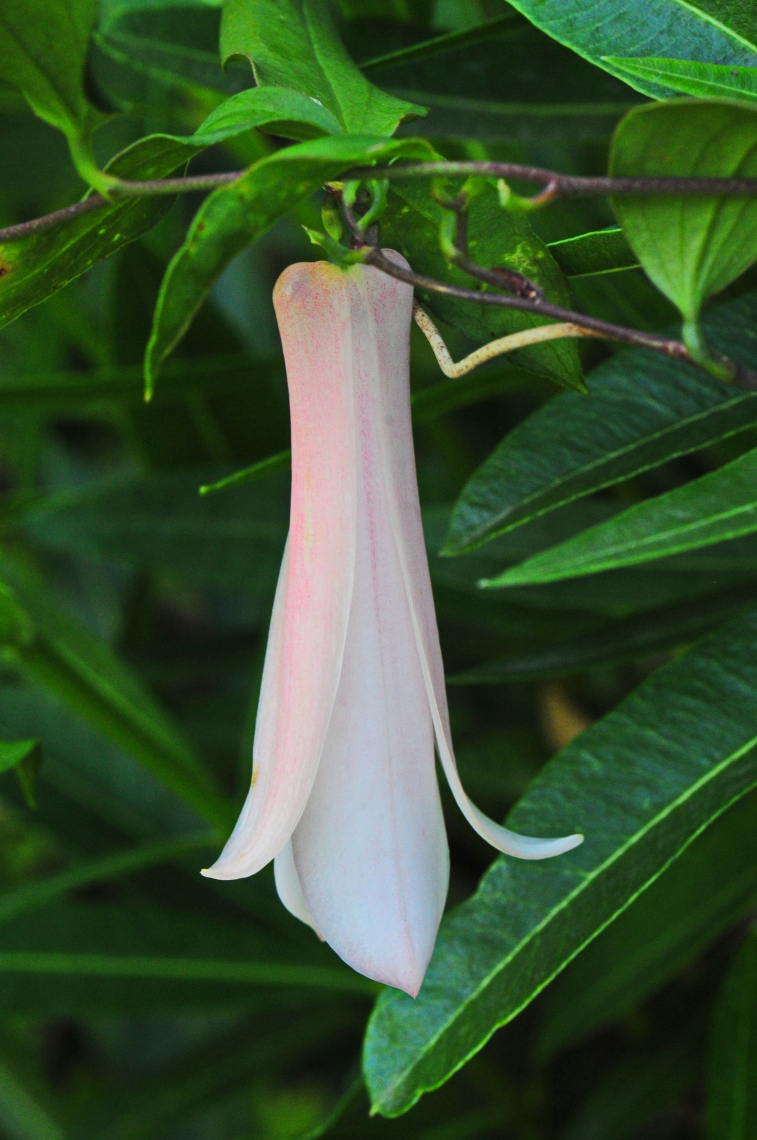
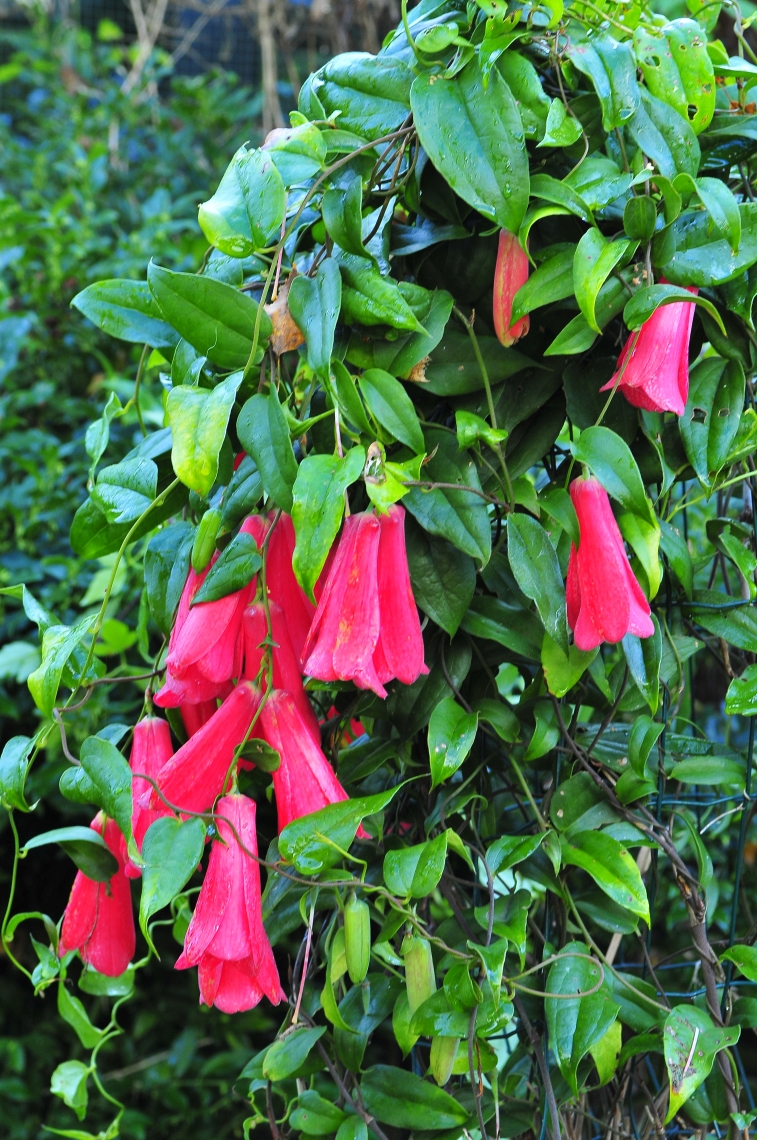
I was fortunate in managing to acquire a plant with red blooms. I’d also read that there were more color variations in existence (white, white with red etc.), but these plants were not obtainable. So I decided to grow young plants from seed. Unfortunately, I was not successful; from all the seeds that I have purchased not a single plant grew.
After reading stories of people trying to germinate the seeds by waiting and treating the seeds until the seeds have germinated, although few people have had success with this method. In 2000 I was able to grow 400 small plants!
In this article I will explain how I obtained seeds, then the plants, and finally how I managed to successfully grow plants by layering.
Acquiring seeds
In the first year I obtained 10 flowers on my plant, after the blossoming period elapsed, seed pods appeared. However because the flowers had not been pollinated, the seeds inside were of no use. I was then prompted to try plant cuttings. After three years I still hadn’t had a cutting that had rooted. In fact three months was the longest any cutting survived before it turned black. I decided that the only way to success was via seeds again. In the meantime, Piet and Tiny van de Zanden had managed to grow two young plants out of 18 seeds.
In 1999 I started to pollinate the flowers on my plant by hand using a small brush. Shortly afterwards, to my surprise I discovered a seed pod and eventually seven seed pods developed. During winter and spring the seed pods grew. My only dilemma now was when would the seeds be ripe. By the end of July a number of the pods had turned brown on one side and had become soft. Although slightly disappointed, I’d at least found a method of pollinating the flowers, even though this meant that not every flower would develop into a seed pod.
I found that after four weeks of pollinating by hand that the flower has become fertilised as the seed pod had become enlarged. A full-grown pod will measure approx. 1cm. in diameter and 4cm. long and hold anywhere between 60 to 100 seeds. In 2000, I managed to fertilise 30 seed pods by using hand pollination.
Pre-treatment and seed sowing
Seed should be ripe after one year. In Holland, the pod becomes soft and seems ready to fall from the plant. Remove the seed from the bulb together with the pulp, leave the seeds for three days in lukewarm water changing the water at regular intervals. This will prevent the top seed layer delaying the germination process.
I sowed my seeds in three different ways with the following results:
| Place | Overripe seeds | Almost ripe seeds |
|---|---|---|
| 14 days in refrigator | X | X |
| In acid soil | X | X |
| In potting soil | X | X |
There was no difference between the over ripe and nearly ripe seeds. There was also no difference in development with seeds kept in the refrigerator, although more of the seeds where covered in mould. Seed planted in acid soil had worse results than those planted in potting soil. The first seeds started to sprout after six weeks in temperatures over day of 20°C and at night 13°C. The soil wasn’t kept too wet. The conditions seamed to be ideal, which prompted me to sow the other seeds as they became ripe. My experiences have taught me that high temperatures and damp soil promote more mold, and to achieve anywhere between 60 – 100% sprouting results the seeds need to be prepared and sown as soon as possible after removal from the pod. I have got fresh seed from Chile(Juan Pablo Alvarez Jahnsen) and I have got just the same results!
Proof that seed becomes hardier after treatment was evident, seeds began to sprouting after being kept in a glasshouse for five months with temperatures between 5 and 10°C.
Very good results give germinating in vermiculite. Put fresh seeds in wet vermiculite. Keep the plastic bag with vermiculite and seeds at room temperature and after one month the seeds start with germinating. The result was a ratio of 95%!
Treatment of young plants
The seeds were sown separately because the parent plant is very sensitive to root movement and disturbance. In the first weeks most of the seeds only had a single shoot and are in this period very susceptible to mold. When the first roots appear out of the bottom of the sowing pot, I replant it in a pot with a depth of 9 cm using a mixture of acid and woodland soil. The growth of young plants is very slow. As for their tenderness; it’s surprising how strong they really are. I’ve seen young plants grow perfectly after they have been lifted by birds and dropped to the ground. Generally the plants prefer dry soil to soil which is too moist! The Lapageria is a plant that grows slowly when it’s young and the first flowers will only appear after three to four years.
Plant layering
Juan Pablo Alvarez Jahnsen, an acquaintance from the Internet, informed me how he had increased his number of plants via seed and layering. So I decided to try for myself. Taking a half hardened stem I sprinkled rooting powder into an incision made half the length of the stem and placed the cutting in. The layering was then held in position under the ground with thick wire close to the parent plant. I kept the layering fairly moist and after four months the first two blades appeared through the soil. Removing the layering from the pot with a generous amount of soil, I replanted it in an acid soil mix were the cutting continued to grow.
Plant care
Plants should be kept in a not-too-warm shady place; this will prevent scorching from the sun. Placing your plant in good quality soil will mean that watering will be at a minimum and feeding (N:P:K=10:30:20) just once a month will be sufficient. The plant should be planted in a mixture of special acid potting soil and woodland soil. Roots from a healthy plant that protrude above the ground should be kept this way, otherwise this will kill the plant.
I re-pot the plant once a year in fresh soil taking care not to disturb the roots. Soil surrounding the roots should be left in place to promote plants flora. The roots of a mature plant are susceptible to damage!
Splitting parts of a plant for the purpose of increasing as written in De Parel No. 6 1997 should be performed with extreme care. If necessary the plant can be pruned so that no flowers remain under the leaves. The Lapageria in general has no problem with vermin, although slugs like the leaves even the older ones. Occasionally the odd scaled insect can be found.
During winter the plant will survive in temperatures down to about 5°C but it’s important that they have sufficient light and that the environment is dry to prevent mold.